Showing posts with label bullets. Show all posts

Saturday, September 23, 2023

91.) Mastering First-Person Camera Controls: Preventing Y-Angle Flipping in Your Game


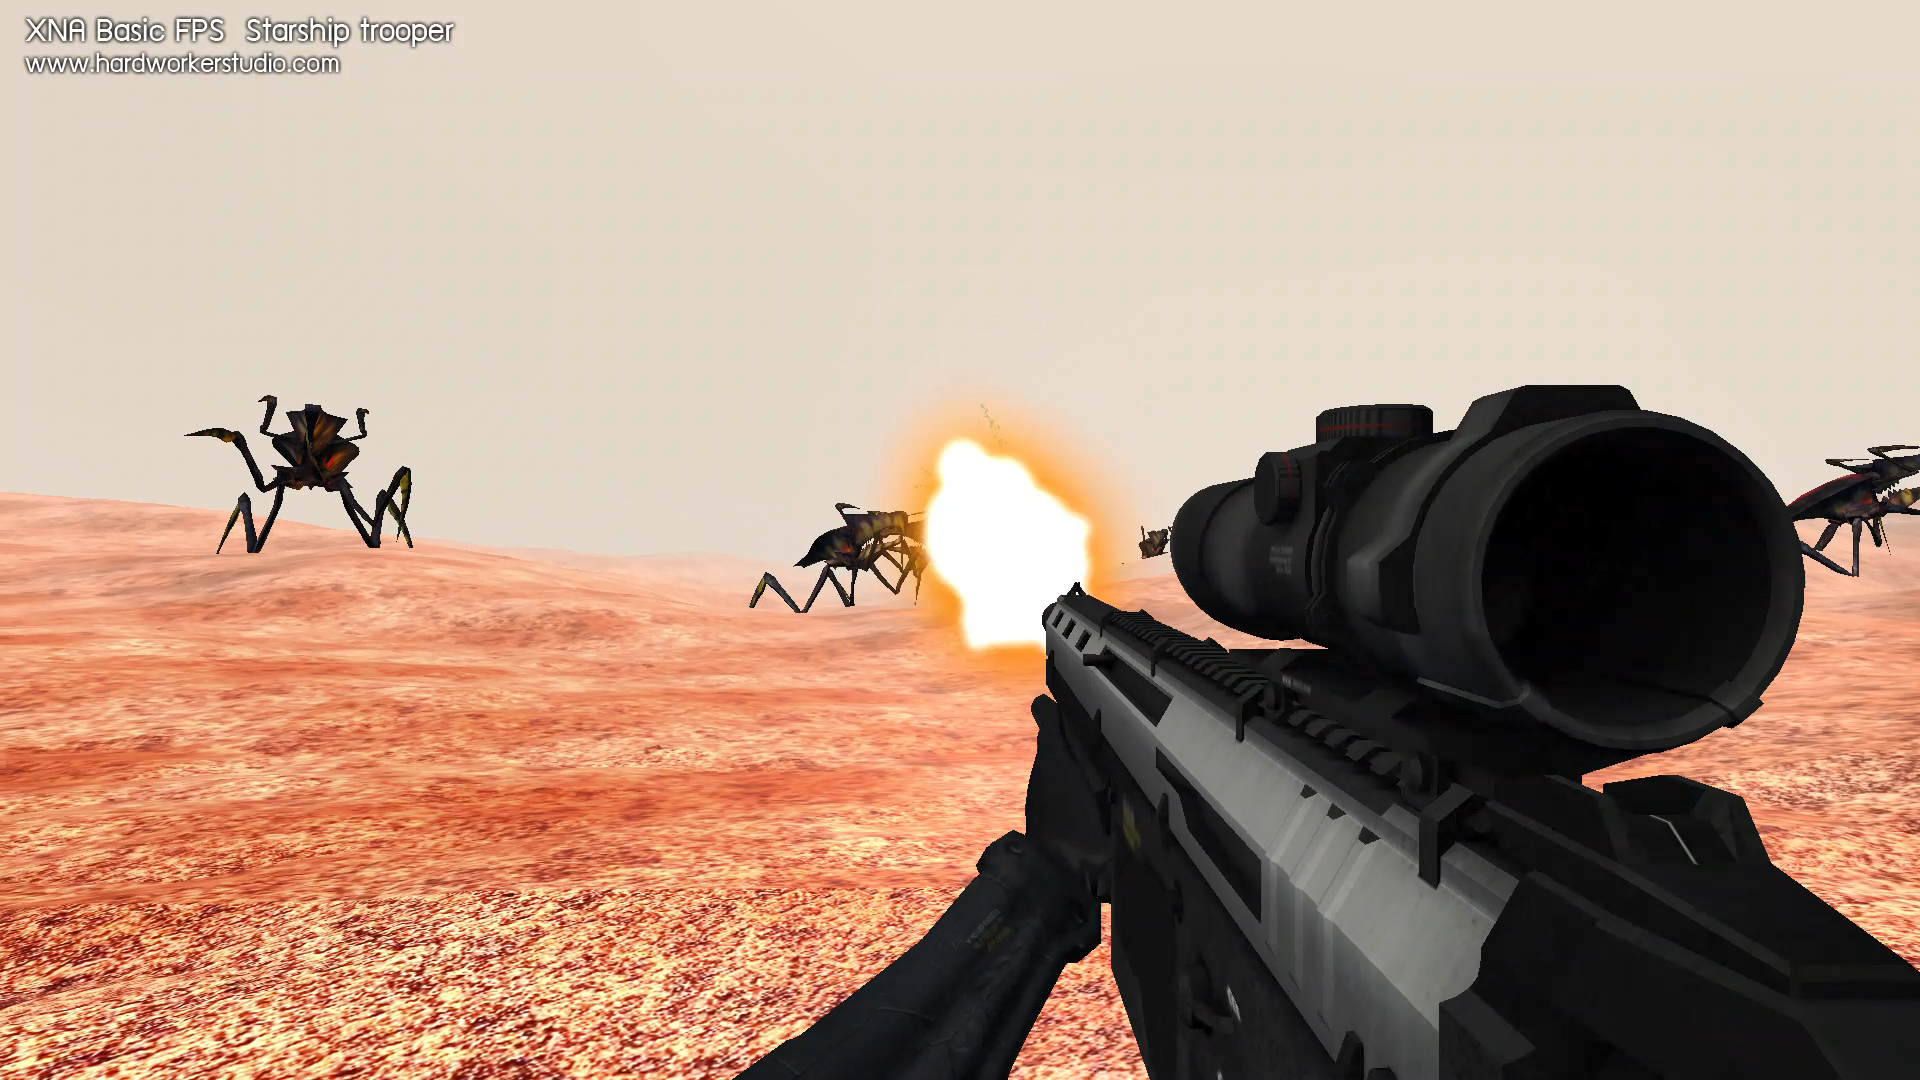
     In the world of game development, creating an immersive first-person experience is a key goal for many developers. One of the fundamental aspects of achieving this goal is getting your camera controls just right. However, a common issue that plagues many first-person games is the Y-angle flipping problem. Character movement and camera control are critical aspects of creating an immersive gaming experience. In this blog post, we'll discuss a common issue in character movement using XNA (Microsoft XNA Community Game Platform): preventing the character's head from flipping or rotating too far on the vertical (Y) axis. We'll provide you with a step-by-step guide on how to restrict the vertical rotation of your character's head to keep it within a specified range. Lets dive into this issue and show you how to prevent it in your game. We will test this first with the original XNA 4.0 Basic FPS Kit inspired by Starship Troopers for you to experiment and try yourself and then another example based on the XNA Chase Camera Sample.


How to Prevent the Y-Angle from Flipping with the XNA 4.0 Basic FPS Kit 


The Y-Angle Flipping Problem

     Before we dive into the solution, let's understand the problem. In many first-person games, the camera is controlled by the player's mouse movements. When a player looks up or down, the Y-angle of the camera changes. However, without proper handling, this can lead to a frustrating experience where the camera flips upside down when the player looks too far up or down.

     Imagine you have a character in your game, and you want players to control the character's viewpoint. However, you don't want the character's head to flip or rotate upside down, as it can break the immersion and create an unrealistic experience for players.


The Solution: Clamping the Y-Angle

     The solution to preventing Y-angle flipping is to clamp the Y-angle within a certain range. This ensures that the camera can't rotate too far up or down, keeping the player's perspective consistent and avoiding the dreaded flip.


Here's a step-by-step guide to implementing this solution in the fps kit:

1. Track Mouse Movements

First, you'll want to track the player's mouse movements. Most game development libraries provide functions to get the mouse's current position.


MouseState mouse = Mouse.GetState();

float deltaX = (mouse.X - centerX) * TurnSpeed * 0.01f;

float deltaY = (mouse.Y - centerY) * TurnSpeed * 0.01f;


2. Update Y-Angle

Update the Y-angle (horizontal rotation) of your camera based on the horizontal mouse movement.

Angle.Y += MathHelper.ToRadians(deltaX);


3. Clamp the X-Angle

Now comes the critical part. You'll want to clamp the X-angle (vertical rotation) to prevent it from going too far up or down. Use MathHelper.Clamp to restrict the angle within a reasonable range.

Angle.X = MathHelper.Clamp(Angle.X + MathHelper.ToRadians(deltaY), -MathHelper.PiOver2, MathHelper.PiOver2);

With this clamping in place, your camera will never flip upside down, no matter how far the player looks up or down.


4. Implement Camera Movement

     Of course, camera controls involve more than just looking around. You'll also want to implement movement controls, such as forward, backward, strafing left, and strafing right. The specifics of this will depend on your game engine and architecture, but ensure that these movements take the camera's orientation into account.


5. Apply the Camera Transformation

Finally, don't forget to update the camera's view matrix or equivalent transformation based on the camera's position and orientation. This matrix is crucial for rendering the game world correctly from the player's perspective. The source code with the solution provided above is available to download below.


First-Person Camera Flip Prevention Example 2
     We'll show you how to solve this problem using another example based off the Chase Camera Sample.

Step 1: Define a Maximum Rotation Limit

To prevent the character's head from flipping too far, you need to define a maximum rotation limit. This limit determines the maximum angle (in radians) your character's head can rotate on the vertical (Y) axis. You can adjust this limit based on your game's requirements. Here's how to define it:

float maxYRotation = MathHelper.ToRadians(80); // Set the maximum allowed Y rotation in radians (adjust as needed)

In this example, we've set maxYRotation to 80 degrees. Feel free to change this value to match your desired rotation limit.


Step 2: Clamp the Rotation Amount

Next, you need to ensure that the rotation amount (rotationAmount.Y) stays within the specified range. To do this, use the MathHelper.Clamp function:

rotationAmount.Y = MathHelper.Clamp(rotationAmount.Y, -maxYRotation, maxYRotation);

This line of code restricts the vertical rotation (rotationAmount.Y) to stay within the range of -maxYRotation (negative limit) and maxYRotation (positive limit).


Step 3: Create the Rotation Matrix

With the rotation amount clamped to the specified range, you can create a rotation matrix that represents the character's head orientation. This matrix ensures that the character's head remains within the allowed rotation limits:

rotationMatrix =

    Matrix.CreateFromAxisAngle(Right, rotationAmount.Y) *

    Matrix.CreateRotationY(rotationAmount.X);


     This code creates the rotation matrix using both the vertical (Y-axis) and horizontal (X-axis) rotation amounts. The Right vector is used to determine the axis of rotation. By following these three simple steps, you can prevent your character's head from flipping or rotating too far on the vertical axis in XNA. This not only enhances the realism of your game but also ensures a smoother and more immersive gaming experience for your players. Remember to adjust the maxYRotation value to suit your game's specific needs. With this control in place, you can create more enjoyable and realistic character movement and camera control in your XNA games.


Conclusion

     In the world of game development, smooth and intuitive first-person camera controls are essential for creating an immersive experience. By understanding and addressing the Y-angle flipping problem, you can provide players with a more enjoyable and frustration-free gaming experience.

     Implementing these solutions will go a long way in improving your game's camera controls, making it more enjoyable and engaging for players. So, go ahead and give it a try in your next game project, and watch as your players appreciate the smoother, more immersive experience you've created. Happy coding!

Monday, February 20, 2017

45. Blood Splatter Test in Starship Troopers?


       This is based off the starter-kit by Hardworker Game Studios which is outdated. I have updated it and re-programmed it in my game engine built upon the XNA 4.0 and MonoGame Fraweworks with the added blood-splatter. It runs on Windows 7, 8 and 10. This program also can run on other platforms supported by MonoGame. The models are simply just a placeholder. This is the beginnings of the AI which is set to simply wander for now.


How do Bullets Work in Games?

Hitscan
       Like the earlier days, the bullets are rendered through a technique called ray-casting. Ray-casting allows the engine to determine the first object intersected by a ray. The majority of games just cast rays along the bullet trajectory to see if there is any collision. This works well since the size of the bullet is usually tiny compared to the size of the world. Many games program bullet sprites (2D images) rendered in 3D which are cast along the ray to provide a visual to the player of bullet projectiles being fired. This also helps with performance. So most cases, game developers find physically modelling a bullet usually pointless. Bounding spheres are attached to the bones of the enemy models for hit detection. So when the ray intersects the bounding spheres, the blood particle effect is emitted. To learn more about implementing ray-casts in your own game projects, check out the Triangle Picking Sample.

       Popular games that use hitscan are Wolfenstein 3D, Doom, Overwatch, Halo and Call of Duty. One of the biggest disadvantages of ray-casting is that the rays have an infinite traveling velocity. Regardless of the range, the rays reach their destination instantly. This ultimately means there is no travel time after you fire a bullet and hit an object. This is not the best method depending on the type of gun used in a game that's based on realism because if the enemy target is miles away, it's impossible to dodge a bullet. In other words, a pistol would have the shooting range of a sniper. Most implementations of hitscans use straight rays. This makes it hard to take into account wind, gravity and other external factors that may affect the bullet once it leaves the gun. So once a player fires their gun, there is no real way to modify its path in the middle. For a "casual" gamers like myself, the hitscan method is a simple learning curve especially for beginner players. However, for games that aim to create an "immersive realistic" shooting experience, the hitscan method creates constraints for their players. This brings me to the next popular method. 


Projectile Ballistics 
       Soon, I plan to run some tests to where the bullets are actual 3D models that will intersect the bounding spheres of the enemies. Why you might ask? In one of my long-term game projects, the modelling of gravity, wind and resistance on the bullet is important as well as seeing bullets being deflected in real-time. With projectile ballistics, every bullet or projectile shot our of a weapon creates a new physics object in the environment. It has its own mass, velocity and hitbox that the game engine will track. This is a priority in games where realism is praised. The drawback to projectile ballistics is that there are additional computations and more processing required in comparison to the hitscan method which is less taxing. Also, game servers will have to make a greater effort making sure all the objects are in sync and remove any conflicts across clients to create smooth multi-player online experiences. 

      Popular games that utilize projectile ballistics are Max Payne and Sniper Elite. Max Payne is known for their popular "Bullet-time" system. Projectile Ballistics is also handy for travel time when taking a long-distance shot or delayed explosions for grenades. For now, I am using the hitscan method. I have also added audio for the gun-fire. Later I plan to add my physics engine and the animated mutant spider beast models. I did not add my physics engine just yet because the terrain was outdated and I didn't want the player as well as the enemies falling infinitely. Once my physics engine is added, the hit detection will be far more accurate. Hopefully I will have the real-time fur effect implemented on the animated spider beast model soon.


Hybrid Systems 
       Many game engines today utilize both hitscan and projectile ballistics. This allows their games to implement a huge variety of weapons. Games such as Halo and Half-Life have weapons that support both these types of physics systems. In Halo, the popular Assault Rifle uses the hitscan method and the Needler uses projectile ballistics. What I've always found unique about the Needler and heat-seeking missiles in flight games is their tracking abilities. The Needler only tracks when the reticule is red which is also true for some flight based games when they lock onto their targets within range. Whenever you're in combat against the Needler, it is smart to go behind cover to block the needles. If you have a long range weapon, or just want to avoid the Needler completely, then be sure to keep your distance away from the enemy using the Needler.


Source Code:


What's All Included: 
1.Basic Rendering system with basic effect.
2. Particle System.
3. Basic object management.
4. The XNA Terrain Library is outdated so I will add my own terrain from my game engine later
5. The XNA 4.0 Skinned Model Sample Pipeline (The Cyclone Game Engine's XNAnimation Library will be used instead in the future to replace this)
6. Anti aliasing 4X
7. Gun-Fire Sound Effect


Saturday, July 21, 2012

4: Creating and Drawing Bullets

       Hello gamers and welcome back to my new blog post. As of 7/20/12, I recently got bullets working in the game engine with the help from a great tutorial I found online called Going Beyond Tutorial 4. In this blog post I am going to show some behind-the-scenes on what we have so far. Remember, this is still a work-in progress and does not represent final footage. I will tweak the bullet class over time. The bullets in the engine travel in the direction the player if facing. Right now I am working on bullet collision with the player and the spider. I created a class called Settings where I keep all the things for the game that remain constant. Inside the settings class I then created two variables; one to store the number of bullets and another to store the speed the bullet is traveling.


int NumBullets = 30;                                                     // Number of Bullets   
public const float BulletSpeed = 100.0f;                        // Speed of the bullet traveling

The Bullet class will flag the bullet as inactive once it drifts off the view.

public void Update(float delta)
{
    position += direction * speed *
                Settings.BulletSpeed * delta;
    if (position.X > Settings.PlayfieldSizeX ||
        position.X < - Settings.PlayfieldSizeX ||
        position.Y >  Settings.PlayfieldSizeY ||
        position.Y < - Settings.PlayfieldSizeY)
        isActive = false;
}

Inside the Game class, I declared my bullet model and created a bullet list.

        Model bullet;

        Matrix[] bulletTransforms;
        Bullet[] bulletList = new Bullet[Settings.NumBullets];


In the Load Content Method:

bullet = Content.Load<Model>("Models/Bullets/bullet");
bulletTransforms = SetupEffectDefaults(bullet);


In the Update Method:

for (int i = 0; i < GameConstants.NumBullets; i++)
            {
                if (bulletList[i].isActive)
                {
                    bulletList[i].Update(timeDelta);
                }
            }


In the Draw Method:

          for (int i = 0; i < Settings.NumBullets; i++)
                {
                    if (bulletList[i].isActive)
                    {
                        Matrix bulletTransform =
                          Matrix.CreateTranslation(bulletList[i].position);
                        DrawBullet(bullet, bulletTransform, bulletTransforms);
                    }
                }

public void DrawBullet(Model bullet, Matrix world, Matrix[] absoluteBoneTransforms)
        {
            bullet.CopyAbsoluteBoneTransformsTo(absoluteBoneTransforms);

            //Draw the model, a model can have multiple meshes, so loop
            foreach (ModelMesh mesh in bullet.Meshes)
            {
                //This is where the mesh orientation is set
                foreach (BasicEffect effect in mesh.Effects)
                {
                    //effect.SetBoneTransforms(bones);
                    effect.EnableDefaultLighting();
                    effect.SpecularColor = new Vector3(0.25f);
                    effect.SpecularPower = 7;

                    effect.World = absoluteBoneTransforms[mesh.ParentBone.Index] * world;

                    // Use the matrices provided by the first person camera
                    effect.View = camera.View;
                    effect.Projection = camera.Projection;
                }
                //Draw the mesh, will use the effects set above.
                mesh.Draw();
            }
        }

In the handle Input Method:

            lastKeyboardState = currentKeyboardState;
            lastGamePadState = currentGamePadState;

            currentKeyboardState = Keyboard.GetState();
            currentGamePadState = GamePad.GetState(PlayerIndex.One);

            if ((currentGamePadState.Triggers.Right > 0f))
            {
                //(volume, pitch, panning)
                fire.Play(1, 1, 0);

             
GamePad.SetVibration(PlayerIndex.One, 0.5f, 0.49f); // Makes player one's gamepad vibrate. It's left motor is at 50%, the right motor is at 49%
             
GamePad.SetVibration(PlayerIndex.One, 0.5f, 0.5f);  // the default vibration


                //add another bullet.  Find an inactive bullet slot and use it
                //if all bullets slots are used, ignore the user input
                for (int i = 0; i < Settings.NumBullets; i++)
                {
                    if (!bulletList[i].isActive)
                    {
                        bulletList[i].direction = player.Direction;
                        bulletList[i].speed = GameConstants.BulletSpeed;
                        bulletList[i].position = player.Position +
                  (200 * bulletList[i].direction);
                        bulletList[i].isActive = true;
                     
                        break; //exit the loop  
                    }
                }


// We translate the gun slightly to make it kickback to give the recoil effect.

                if (weaponOffset.Z <= 1)
                {
                    weaponOffset.Z += 0.2f;

                }
                else
                    if (weaponOffset.Z > 0)
                    {
                        weaponOffset.Z -= 0.9f;
                    }

         
            }
            else
            {
                fire.Play(0f, 0f, 0f);
                GamePad.SetVibration(PlayerIndex.One, 0.0f, 0.0f); // no vibration
             
             
            }

RESULTS:


This picture above is what I have so far. I will tweak it some so the the bullets will fire at an angle out of the muzzle of the gun. I will probably create a bullet offset vector to help this problem. Then I will work on creating a ray tracer to give off bullet trails. Afterwards, I will add a smoke effect for when the player shoots and a muzzle flash.