Showing posts with label 3D Modeling. Show all posts

Friday, July 14, 2023

88.) Terminal Map Remake Early Prototype


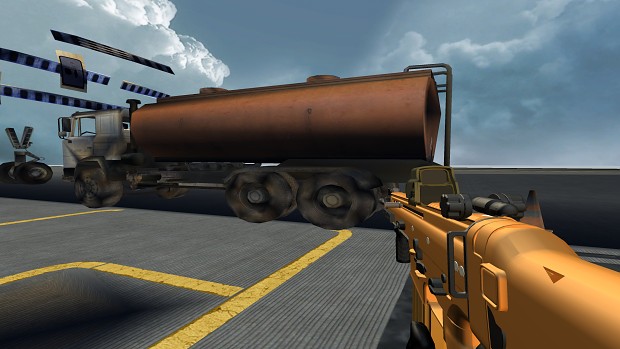
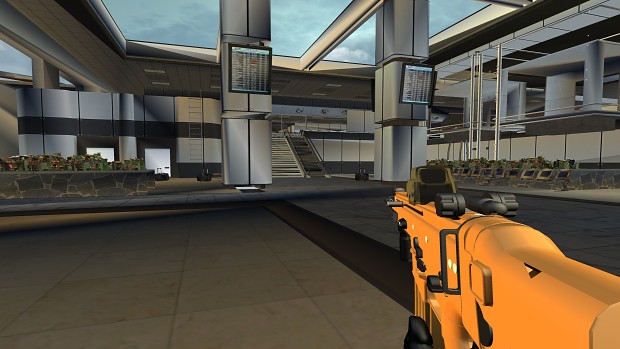
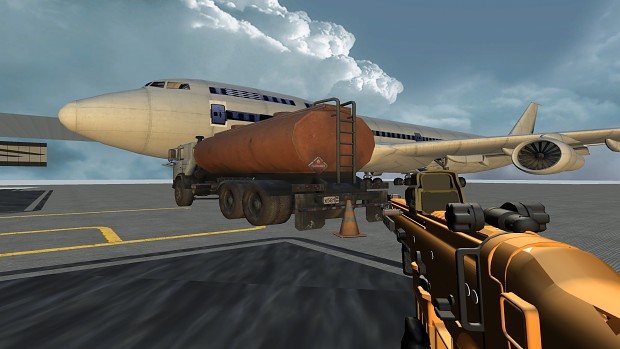
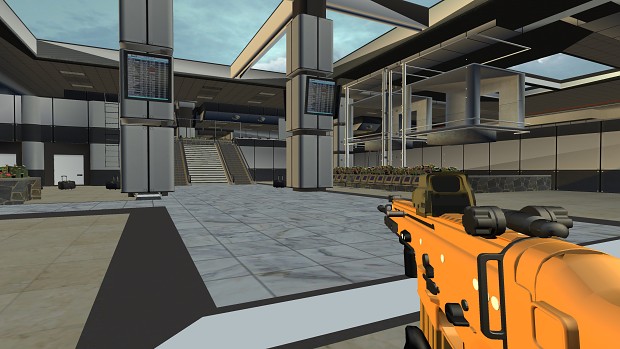
     Today, we embark on an exciting journey to recreate one of the most iconic multiplayer maps in gaming history: Terminal from Call of Duty: Modern Warfare 2. My goal is to rebuild the map from scratch in the Cyclone Game Engine using the XNA framework and MonoGame, alongside a couple of powerful tools that will enhance our development process. I started the day by studying the original map's layout, textures, and gameplay mechanics. Immersing myself in the details of Terminal, I carefully analyzed the paths, chokepoints, and strategic areas that made the map so memorable. Armed with this knowledge, I brainstormed ideas on how to translate those elements into the engine, ensuring I captured the essence of the original map while also infusing some of my own creative touches.
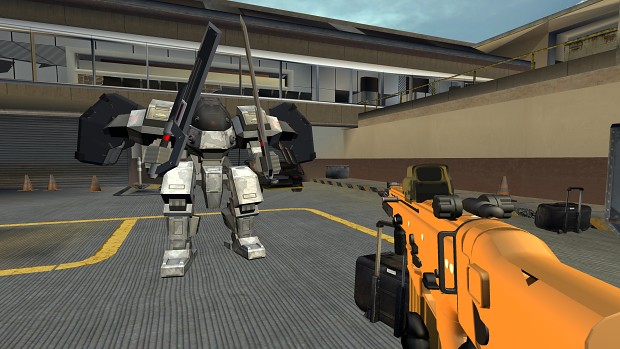

Terminal Remake Devlog v1


     To bring life to our character, I turned to Mixamo, a fantastic tool for character animation. With Mixamo, I was able to access a vast library of pre-made character animations and easily apply them to my in-game model. This saved me a tremendous amount of time and effort, allowing me to focus more on other aspects of the game development process. Jiggle Library-X (JigLibX) is utilized for the physics. Models from the scene are being extracted and and tested for collision.
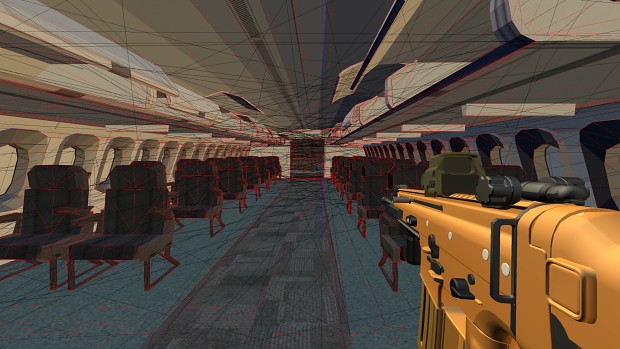
Terminal Map Remake Screenshots V2 

     One of the biggest challenges is performance for the physics on more detailed models like in this picture above which also resulted in slowing the game's frame-rate. To fix this, I will most likely create two models; a low poly and high poly version. Low-poly models will be rendered unseen and most likely used for the models' collision physics to help with performance. The high-poly models with more detailed meshes will be visible for more pleasing visual aesthetics.In addition to leveraging Mixamo for character animation and Jiggle Library-X for physics, I also incorporated another powerful tool into our development arsenal: the XNAnimation library originally created by Bruno Evangelista. The XNAnimation library provided us with an extensive set of tools and functionalities to handle character animation within the XNA framework. This library enabled me to import and manage complex skeletal animations seamlessly. With XNAnimation, I could rig and animate our character model, ensuring fluid and realistic movements.

     One of the standout features of the XNAnimation library was its support for skeletal animation blending. This allowed me to smoothly transition between different animations, such as running, jumping, and shooting, providing a seamless and immersive experience for the players. However, animation blending is not presented in this following video. I was able to define animation states, set up animation trees, and control the blending parameters to achieve the desired results. Furthermore, the XNAnimation library offered a range of utilities for retargeting animations, which proved invaluable during my development process. I was able to transfer animations from one character model to another with varying skeletal structures, saving significant time and effort in adapting animations to different characters or variations within our game.


Bone Rotation Problem
     During the development process, I encountered various challenges related to character animation and camera interactions. While Mixamo proved to be a reliable tool for basic animations like walking and running, we realized that we needed additional techniques to achieve more complex actions and enhance the overall player experience. For instance, as you can see in this video, we need to address the issue of the bone moving with the camera rotation, particularly when looking up and down or aiming at a target from different positions.
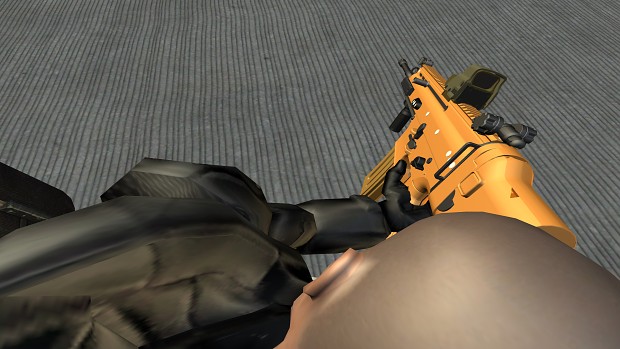
Terminal Map Remake Screenshots V2 

     To fix this, I will turn to procedural animation and inverse kinematics. These techniques will allow us to dynamically adjust the character's animations and limb positions based on the player's input or environmental factors.  To further enhance the character's interaction with the environment, I most likely plan to incorporate inverse kinematics into my development process. Inverse kinematics will help to prevent the player from seeing the character's body when the bones of the model rotates in first-person perspective when looking up and down. 

     By implementing Inverse kinematics, this will enable us to precisely control the placement and movement of the character's limbs, making actions such as aiming at targets or reaching for objects appear more natural and lifelike. Whether it’s reaching for a weapon or interacting with an in-game object, an IK system in XNAnimation will help me to achieve a higher level of realism and interactivity in our games. Inverse kinematics allows us to calculate the positions and rotations of the character's joints dynamically, taking into account factors like the player's input or the position of the target in the game world. 

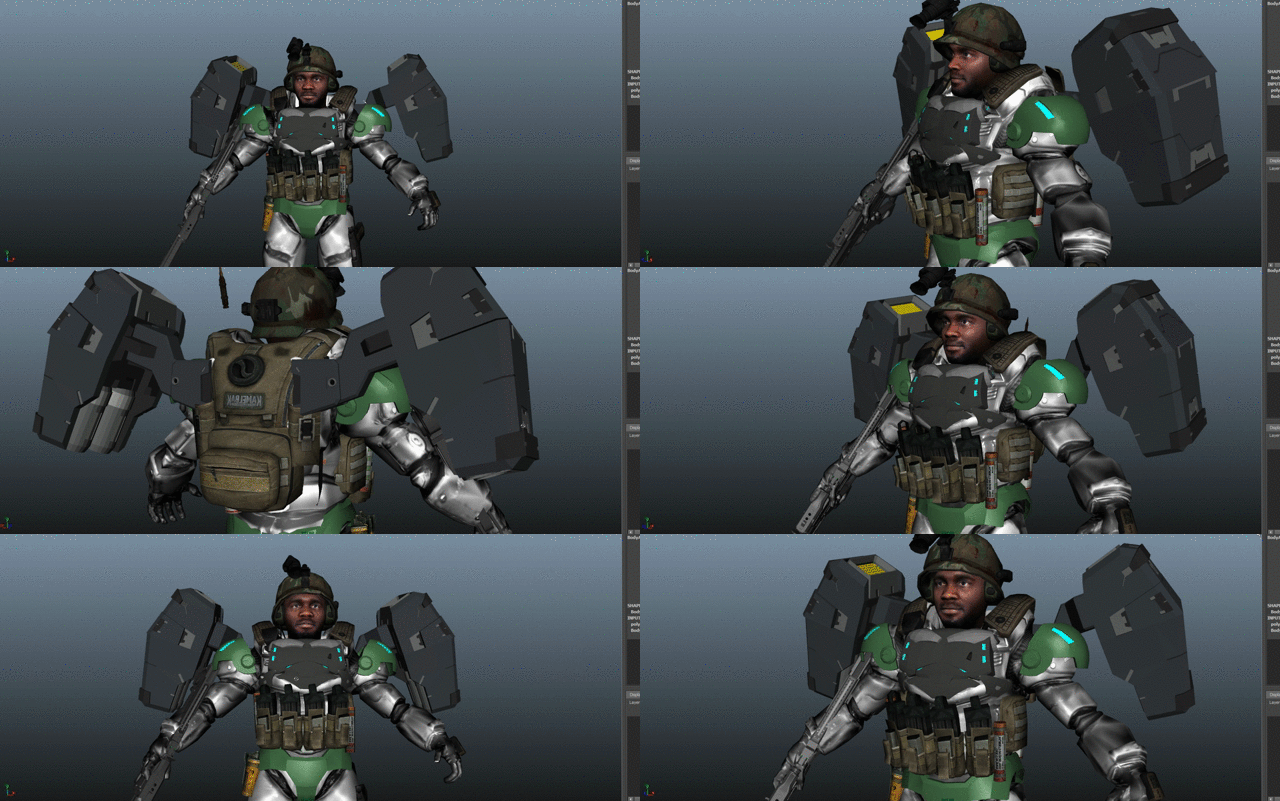
     To implement procedural animation, I leveraged the power of Maya, a widely-used 3D modeling and animation software. Using Maya, I exported the animated model from Mixamo and then customized the animation rigs to accommodate the specific camera interactions I desired. By fine-tuning the rigging and adjusting bone weights, this will ensure that the character's movements responds smoothly and realistically to the player's camera rotations. 


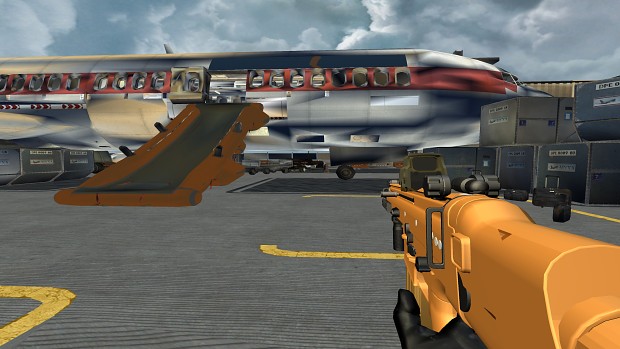
Problem: Black Spots Appearing on Mesh Faces
Terminal Remake Devlog v1
Before: Dark Spots Problem Pic-1


Terminal Remake Devlog v1
Darks Spots Problem Pic-2


Terminal Remake Devlog v1
Dark Spots Problem Pic-3

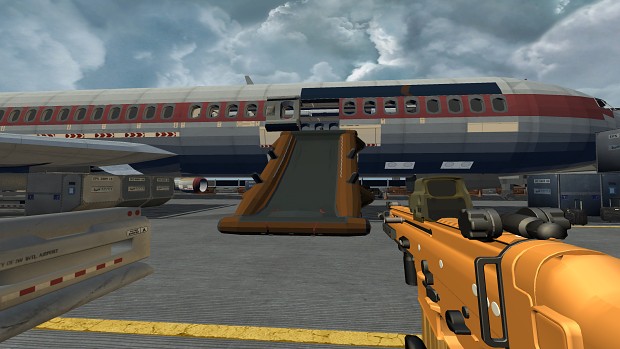
     Many of the models were created using SketchUp. When imported into Maya as a .fbx file, I noticed many dark spots appearing on the faces for some reason on the models. First I tried clearing the mesh and nothing changed. Changing the texture didn't solve the problem either. Then I tried deleting a face and appending a new face at the same place which worked and made the black spots disappear. However, this was time consuming to fix all the faces by hand especially on very detailed models. The best solution was to unlock the normals of the model which removed all of the dark spots.


Solution: Unlock Normals
Terminal Map Remake Progress Screenshots V2
After: Dark Spots Successfully Removed


Terminal Map Remake Progress Screenshots V2
Dark Spots Removed Pic-2


Terminal Map Remake Progress Screenshots V2
Dark Spots Removed Pic-3


     In Autodesk Maya 2015, click on Normals at the top and select Unlock Normals. This helped to remove the dark spots on the models and made the textures far clearer and improved their visibility. To verify that the normals are unlocked:

1.) Go to Display
2.) Select Polygons
3.) Then select Vertex Normals.

Normals should show a green line when unlocked and yellow when locked. Leave them unlocked. You can see the results of the removed dark spots in the video below. Some of the textures still pop-in and out so they will have to be resized. 


     Please note that the gameplay footage showcased in the videos above are very early stages of development and should not be considered representative of the final product. We want to emphasize that significant progress and improvements are yet to come, as we continue to refine and polish the game. During this early phase, our main focus was on establishing the core mechanics and functionality of the game. The level design, character animations, textures, and overall visual quality are all subject to change and refinement in the upcoming stages of development. We understand that the current gameplay footage may lack certain features, exhibit placeholder assets, or have performance issues that will be addressed in due course.

     It is crucial to keep in mind that this is just a glimpse into our development process and a work in progress. We remain committed to delivering a high-quality and enjoyable gaming experience. As we progress further, we will be implementing additional features, enhancing the visuals, optimizing performance, and addressing any issues that may arise along the way. We appreciate your support and understanding as we continue to work tirelessly to bring you the best possible version of our game. Stay tuned for future updates and be assured that the final product will be a significant improvement over this early footage.


Tuesday, December 27, 2022

84.) Steel Cyclone Studios Launches 3D Assets for Sale!!


     Forget about the hassles of modeling or paying someone to create your 3D assets. Find high quality 3D models that are perfect for everyone from game developers to interior designers and more. Do you want to make progress on your projects but worried you don't have the time or the budget? Cut out all the middlemen, buy directly from Steel Cyclone Studios on Gumroad and save! Import 3D objects and scenes from their library of popular models. Work with a small set of high-quality assets that are easy to modify, assemble and reuse. Save time with pre-built content that is available in the libraries to suit your needs. Save hours of time and money with their affordable products and take your game projects to new heights with these 3D models. 

Saturday, December 10, 2022

83.) Free HK17 Prototype 3D Model Giveaway!

       The HK417 is a battle rifle modeled after Heckler & Koch. This is a free prototype model you can use for your commercial and non-commercial projects. It includes an EOTech EXPS3 holosight, Grip, Scout-Light and Suppressor. 


It’s not entirely as accurate as I hoped, so I’ve made it available for free. Enjoy


Tuesday, December 6, 2022

82.) Free 3D Monster Truck Model Giveaway!

    Download this awesome FREE 3D Monster Truck model to use in your projects for commercial or non-commercial use!! It’s not perfect by any means, however its free and great to jump-start a vehicle in your game project. Courtesy of Steel Cyclone Studios, the file comes in .fbx. - Enjoy!


Wednesday, September 21, 2022

81.) Adobe Fuse & Mixamo Fuse Character Creation!


     Created by Mixamo, Fuse is a 3D computer graphics program that helps you to quickly and easily create 3D characters. Formerly known as Fuse Character Creator, it's a fantastic tool for video game developers, modders and enthusiasts. You can edit 3D characters with ease by choosing parts as you require and pulling and pushing them to change the appearance. 


Adobe Fuse Discontinued?


     Fuse has been removed from Creative Cloud and is no longer available for download. However, I have made it available at the downloadable links provided below. Feel free to download it; it's safe. I hope people find this useful. Enjoy!!


Download Adobe Fuse!! 


Friday, July 15, 2022

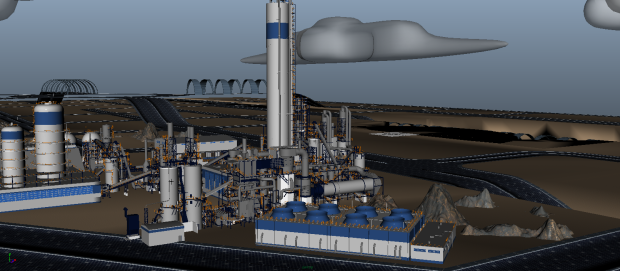
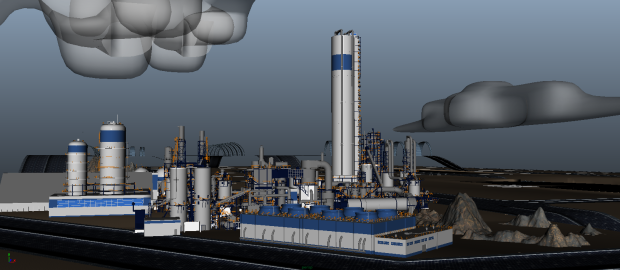
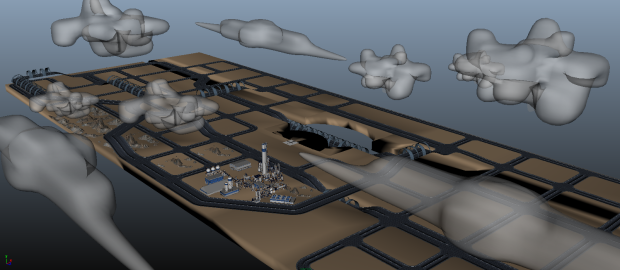
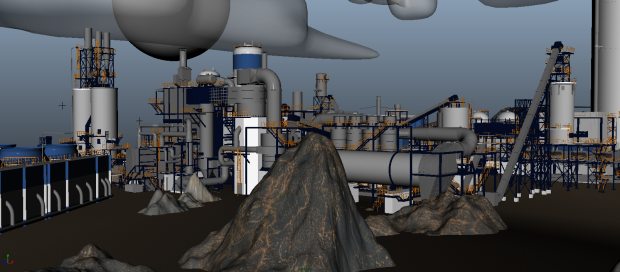
80.) 3D Game Map In Development of a Futuristic Base Level

Map

     Set atop a moon in a somewhat distant future, the map is an abandoned mining research facility once controlled by a fictional military corporation broken up into several areas. Space Mining has become a lucrative business. There are rumors and speculations that the mining facility was constructed around an alien crash site 


Map


Map

     The base contains solar-powered roads. They are roads “paved” with extremely strong solar panels that are covered in glass that can withstand environmental stressors and the weight of vehicles driving over them on a consistent basis. The roads help to both store and produce electricity wherever needed. 


Map


Map
Top View


Map


Saturday, December 5, 2020

70.) Superstar McClain is born!!!

       With the help of FaceGen, I was able to quickly 3D model my head from photographs and transform myself into a game character. FaceGen is a 3D modeling middle-ware produced by Singular Inversions. It has been used for player character creation in Tiger Woods PGA Tour (photo game face), The Elder Scrolls IV: Oblivion and the Football Manager series. FaceGen exports to the native formats of most popular 3D packages. The models are a bit heavy on geometry, but upon import into your favorite 3D package, detail is easily reduced. I was impressed by how accurate the results were. 


SO BEAUTIFUL!! LOL 


Friday, December 4, 2020

69.) Character Rig & Skeleton Bone Visualizer


       After expanding the XNAnimation library to support multiple animations working from a single .fbx model file, which I discussed in a previous post, I also adopted an approach originally created by Andy Dunn (aka The Zman). In his approach, each animation is to exported into a separate FBX file, and then a custom processor is used to merge them. With the help of Mixamo, I was able to add a wide range of animations to my game characters. Mixamo offers thousands of animations to choose from and an automatic rigging service. The base character model is solely a T-pose rig with no other additional animations. The animations from Mixamo are exported in separate files and the program plays their animations and applies them to the T-pose rig, thus animating the character. This approach essentially allows me to add an infinite number of animations. 

       In short, now the engine supports both multiple animations from a single .fbx model file and animations from separate .fbx files. Essentially both methods can also be applied at once. Thanks to Tom Looman, I was able to integrate the Rig/Skeleton Visualizer from the sgMotion library. It visualizes the animation skeleton to debug animation and rigging issues and helps finding bone/dummy names and indices more easily. The sgMotion library also allows you to cycle through the skeleton to highlight bones and their children. The source code to the sgMotion library can be found below. Unfortunately I had to mute the song in the video above to avoid any copyright claims.

(Source Code & Tutorial Coming Soon)

Special Thanks
  • Bruno Evangelista for his original work
  • Carlos Augusto of Floatbox Studios for the character marine
  • Tom Looman for the Rig/Skeleton Visualizer
  • Andy Dunn (aka The Zman) for the Merge Processor 
  • cjHazard for the FBX multi-take importer

Thanks guys!


sgMotion Source Code:


Wednesday, December 26, 2018

60.) Welcome to Character Creator 3


       Create some stunning characters for your game projects with Character Creator 3! This is a tool that allows you to create stylized or realistic animated characters for use in iClone, Maya, Unreal Engine 4, Unity, Cry Engine or any other 3D applications.


Other Links

Follow Reallusion! 

Wednesday, February 28, 2018

54. Monster Truck Basic Modeling Process


       Welcome to my next blog post where I share a basic insight into creating models for my game projects. For the vehicles, I attended car shows to gather references to model from. I took pictures of the front, back, sides and top of the vehicle to help with the modeling process. There are many ways I approach this and often I try different methods. This blog post simply illustrates the basic workflow I follow. The first part is to block out the 3d model. This step is about keeping the geometry simple and getting the proportions and shapes right. I often start this in sketchup to keep everything low-poly and simple. I normally don't model the vehicle in its entirety. I model individual components of the vehicle separately to be assembled later. For example, I will model the chassis, wheels, suspension, seat, and engine separately and then import the models to into one scene to configure the vehicle. Below is a screenshot of the final assembly. 


Final Assembly

       I use Sketchup for this to keep everything low-poly and pretty basic. Once the assembly is complete, I export the model as a .3ds file to later be imported in 3D Studio Max. If you don't have 3D Studio Max, you can import .3ds files into Blender. After touching up the model in 3ds Max or Blender, I export the model as a .fbx file and import it into Autodesk Maya. I am aware that Sketchup can export .fbx file types. I've encountered issues when I import an .fbx file exported from Sketchup such as missing faces and gaps in the models' geometry. I've found ways to fix most of them however, when exported as a .3ds file from Sketchup, all of the detail, textures and geometry is retained with no issues for the most part.


SketchUp Feature Request: Customizable Navigation
       First, I’d like to say that SketchUp is an amazing application. I would like to suggest a feature that would make not only my work in SketchUp more enjoyable, but others as well. Like myself, there are many who use other 3D software alongside SketchUp. What it SketchUp offered options to suit users’ preferences that allow them to customize their navigation controls? What if the user could click on settings and assign different keys or a combination for changing the navigation controls. We’ve seen this feature work well in videogames. Allowing the user to somehow emulate the controls of their favorite 3D App would enhance their experience in SketchUp because it would be more pleasant and consistent when going back and forth between programs. For example, I am an Autodesk Maya user for the most part as it’s the modeling program I am most familiar with. I am use to holding down the ‘alt’ key, then dragging the left mouse button to rotate, the middle mouse to pan and the right button to zoom. As much as I enjoy using SketchUp, often times I forget that everything is different and find myself spending a few extra minutes trying to adjust.

For example:

Maya:
Alt + Hold-Left-Mouse = orbit view
Alt + Hold-Right-Mouse + Drag Right = zoom view in
Alt + Hold-Right-Mouse + Drag Left = zoom view out
Alt + Hold-Middle-Mouse = pan view

Sketchup:
Hold-Middle-Mouse = orbit view
Roll-Mouse-Wheel = zoom view in/out
Shift + Hold-Middle-Mouse = pan view


       I often start out modeling SketchUp since it has the ability to do a number of things much faster than Maya, but because the navigation and tool hotkeys are so different from one another, I stumble over my old habits trying to use them more so. Wings 3D for instance lets you set a preference as to how the navigation works, and better yet it has a drop down list of 3D apps that you can emulate. Many users feel at home when they enter Wings right because they instantly know how to get around. If SketchUp allowed the user to assign the mouse buttons along with the modifier keys to navigational functions then you could make SketchUp navigate the way you want instead of being forced to learn a new system or have to adjust to it all of a sudden after spending a few hours in a different program. In short, to have user’s 3D navigation muscle memory they’ve built up by a different program to be supported would supplement very well. Anyway, I just figured a feature like this would help many 3D users out there besides me adapt more easily to the way SketchUp works.


       I often go back and model different components of the vehicle separately and add them back in such as the engine and the springs. 


Textures Turned Off

Wireframe

Viewports


Converting Triangulated Model Meshes to Quads
       This helpful video below shows how the Quadrangulate command in Autodesk Maya can help clean up a triangulated mesh into a mesh with quad faces.  I converted some of my models to quads because my physics engine; JigLibX, handles collision detection better with models whose polygon faces contain quads rather than triangles. So my last step was to convert my models containing lots of triangles to quads. Converting polygon faces to quads is a good was to clean up polygons or reduce the number of faces. 

To convert faces to triangles or quadrangles

1. Select the faces.
2. Do one of the following:
  • Select Mesh > Triangulate.
  • Select Mesh > Quadrangulate.
3. I found better results when I opened the Quadrangulate options and adjusted the angle threshold.


Free 3D Monster Truck Model Download


Wednesday, April 13, 2016

33. Basic Car Drifting Physics


       After some trial and error, I was able to get some drifting mechanics working for my vehicle physics. I am continuing to modify and improve the JigLibX Physics Library that I ported over to XNA 4.0 and MonoGame. Inside my Wheel.cs (wheel class), the key was a variable named "smallVel". This variable applies a force between the drive force and the side force. Initially, it was set to three and I decided to change it to 20 for this vehicle. At the moment, it feels like I am driving on ice but it is controllable which makes it a lot of fun to drift. 

Make the following changes so that the car doesn't slide around too much when stopped: 

            float smallVel;
            if (angVel == 0 & !locked)
            {
                smallVel = 1;
            }
            else smallVel = 20;


To give it more of an authentic feel, you can decrease smallVel to tweleve. I also greatly improved the handling. I will most likely create a starter kit based off of this sample program. So if you are using XNA 4.0 or MonoGame and need some on-road, off-road or arcade style car physics, this will help.


Triangle Mesh Collision Problem
       Many developers using JigLibX in XNA had many problems with the Triangle Mesh Object, especially when using it as a ground model but not with the Height Map Object. I sometimes run into these issues. When a physics object hits a vertex or seam between triangles in the mesh, strange things can occur. 


Solution 
       I separated the garage model into multiple meshes; just two for the most part. Using Autodesk Maya, I then selected them all, grouped them and finally exported the selection. You might have to separate models that have a lot of triangles and faces into separate models. JigLibX uses models that support 16-bit indices in size and not 32-bit. When using the TriangleMeshObject, I found that JigLibX handles collision detection better with models whose polygon faces contain quads rather than triangles. So my next step was to convert my models containing lots of triangles to quads. Converting polygon faces to quads is a good was to clean up polygons or reduce the number of faces. To convert polygon faces to quads in Autodesk Maya, simply select the Mesh option at the top and then Quadrangulate. Below is the changes made to my JigLibX TriangeMeshObject.cs code that lets you extract the vertices and indices from a loaded model.


using System;
using System.Collections.Generic;
using System.Text;
using Microsoft.Xna.Framework.Graphics;
using Microsoft.Xna.Framework;
using JigLibX.Geometry;
using JigLibX.Physics;
using JigLibX.Collision;


namespace JigLibXGame
{
    class TriangleMeshObject : PhysicObject
    {
        TriangleMesh triangleMesh;
        Matrix xform;
        public TriangleMeshObject(Game game, Model model, Matrix orientation, Vector3 position)
            : base(game, model)
        {
            body = new Body();
            collision = new CollisionSkin(null);
            triangleMesh = new TriangleMesh();
            List<Vector3> vertexList = new List<Vector3>();
            List<TriangleVertexIndices> indexList = new List<TriangleVertexIndices>();
            ExtractData(vertexList, indexList, model);
            triangleMesh.CreateMesh(vertexList, indexList, 4, 1.0f);
            collision.AddPrimitive(triangleMesh, new MaterialProperties(0.8f, 0.7f, 0.6f));
            PhysicsSystem.CurrentPhysicsSystem.CollisionSystem.AddCollisionSkin(collision);
            // Transform
            collision.ApplyLocalTransform(new JigLibX.Math.Transform(position, orientation));
            // we also need to move this dummy, so the object is *rendered* at the correct 
               position
            // body.MoveTo(position, orientation);
            this.body.CollisionSkin = this.collision;
          
        }

    
        // Helper Method to get the vertex and index List from the model.
        public void ExtractData(List<Vector3> vertices, List<TriangleVertexIndices> indices, Model model)
        {
            Matrix[] bones_ = new Matrix[model.Bones.Count];
            model.CopyAbsoluteBoneTransformsTo(bones_);
            foreach (ModelMesh mm in model.Meshes)
            {
                Game.GraphicsDevice.RasterizerState = RasterizerState.CullNone;
              
                xform = bones_[mm.ParentBone.Index];
                foreach (ModelMeshPart mmp in mm.MeshParts)
                {
                    int offset = vertices.Count;
                    Vector3[] a = new Vector3[mmp.NumVertices];
                    int vertexStride = mmp.VertexBuffer.VertexDeclaration.VertexStride;
                    mmp.VertexBuffer.GetData<Vector3>(mmp.VertexOffset * vertexStride, a, 0, mmp.NumVertices, vertexStride);
                   
                    for (int i = 0; i != a.Length; ++i)
                        Vector3.Transform(ref a[i], ref xform, out a[i]);
                    vertices.AddRange(a);

                    // new
                    for (int i = 0; i < a.Length; i++) vertices.Add(new Vector3(a[i].X, a[i].Y, a[i].Z));

                    if (mmp.IndexBuffer.IndexElementSize != IndexElementSize.SixteenBits)
                        throw new Exception(
                            String.Format("Model uses 32-bit indices, which are not supported."));
                    short[] s = new short[mmp.PrimitiveCount * 3];
                    
                    mmp.IndexBuffer.GetData<short>(mmp.StartIndex * 2, s, 0, mmp.PrimitiveCount * 3);
                    JigLibX.Geometry.TriangleVertexIndices[] tvi = new JigLibX.Geometry.TriangleVertexIndices[mmp.PrimitiveCount];
                    for (int i = 0; i != tvi.Length; ++i)
                    {
                        tvi[i].I0 = s[i * 3 + 2] + offset;
                        tvi[i].I1 = s[i * 3 + 1] + offset;
                        tvi[i].I2 = s[i * 3 + 0] + offset;
                    }
                    indices.AddRange(tvi);
                }
            }
        }
  
        public override void ApplyEffects(BasicEffect effect)
        {
            //effect.DiffuseColor = Vector3.One * 0.8f;
            
        }
    }
}


How to Convert a Triangulated Mesh into Quads in 3DS Max 
       So now I have encountered a situation where I need quad based meshes and I have many 3D models with triangulated ones. Initially I would manually convert the model to quads by selecting groups of triangles. If the model is very complex, this can be extremely time consuming which can pose a problem. Luckily, there is an easier way in this tutorial below by Chandan Kumar who introduces an amazing free script to save time converting triangulated meshes to quads. You can download it here.


       Next I will be making a way where the player can switch to cockpit-view and drive in first-person perspective while in-game. Thanks for reading and I look forward to posting more updates. If you have found this blog post helpful or would like to share any improvements, please comment below.